GoCardless Setup Guide
/docs/Fees/setup-gocardless
This guide explains how to connect GoCardless with your system so you can collect Direct Debit payments automatically.
GoCardless is used only for Direct Debit payments. If you also wish to accept card payments, you can run Stripe alongside GoCardless — using:
- GoCardless for Direct Debit
- Stripe for card payments
Both platforms are widely used and offer very competitive transaction fees.
Estimated setup time: 10-20 minutes.
Step 1: Create a GoCardless Account
Create your GoCardless account using the link below:
Note We are unable to assist with GoCardless account creation or registration issues.
Please contact GoCardless support directly if you experience any problems during signup.
Step Complete
Step 2: Create an Access Token
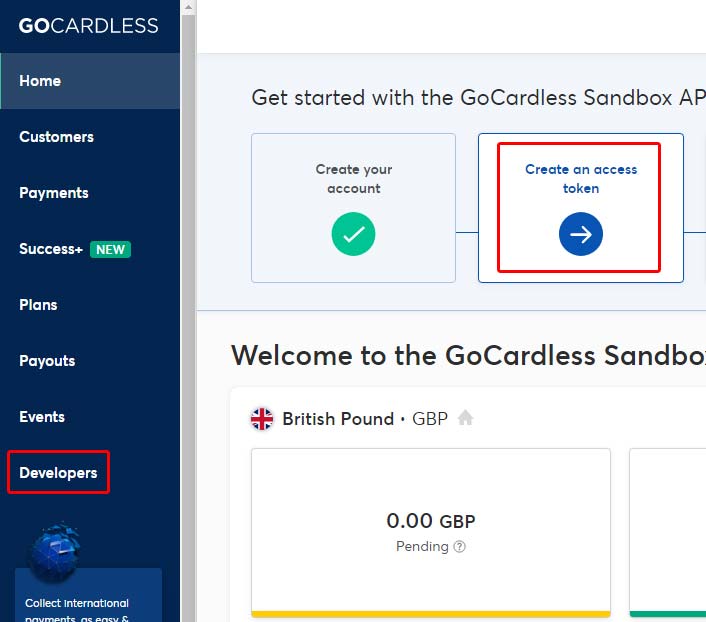
After logging into GoCardless, locate the Get Started Guide and click:
Create an Access Token
(Click image to open in a new window)
Alternative Method
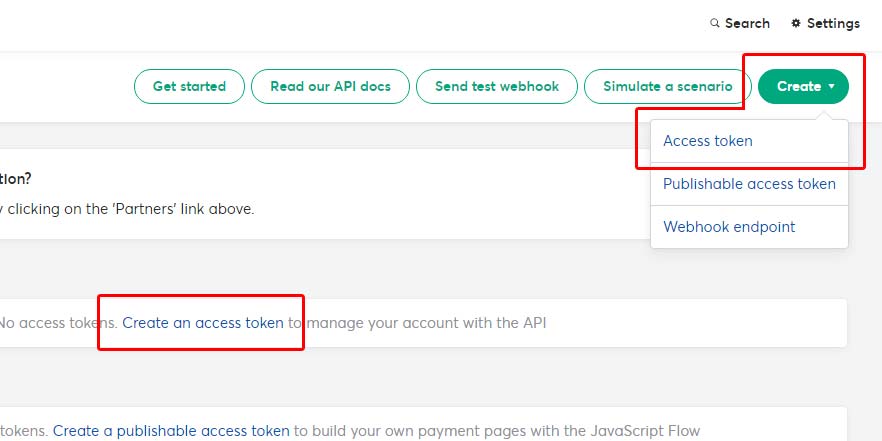
If the guide has been dismissed, you can create the token manually.
Navigate to:
Developers → Create → Access Token
(Click image to open in a new window)
Token Settings
Complete the form using the following details:
Name:
IBEAMS
Scope:
Read-write access

Once completed, create the token.
Step Complete
Step 3: Add the Access Token to IBEAMS
After creating the token, GoCardless will display it.
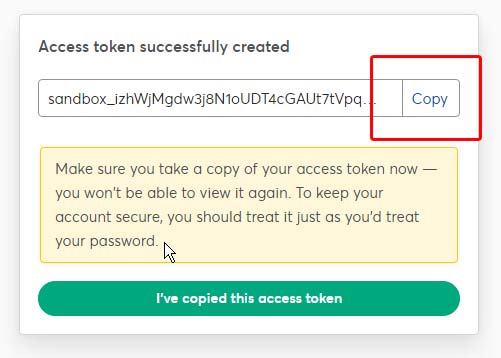
Copy the Access Token and add it to your system:
Navigate to:
Settings → Payment Gateway → GoCardless Settings
Paste the Access Token into the Access Token field and click Save.
Note: Leave the Webhook field empty for now. This will be configured in the next step.
Step Complete
Step 4: Create the Webhook Endpoint
The webhook endpoint allows GoCardless to automatically notify the system when payments are received.
This ensures that:
- Invoice payments are recorded automatically
- No manual payment entry is required
Inside GoCardless, click:
Create a webhook endpoint
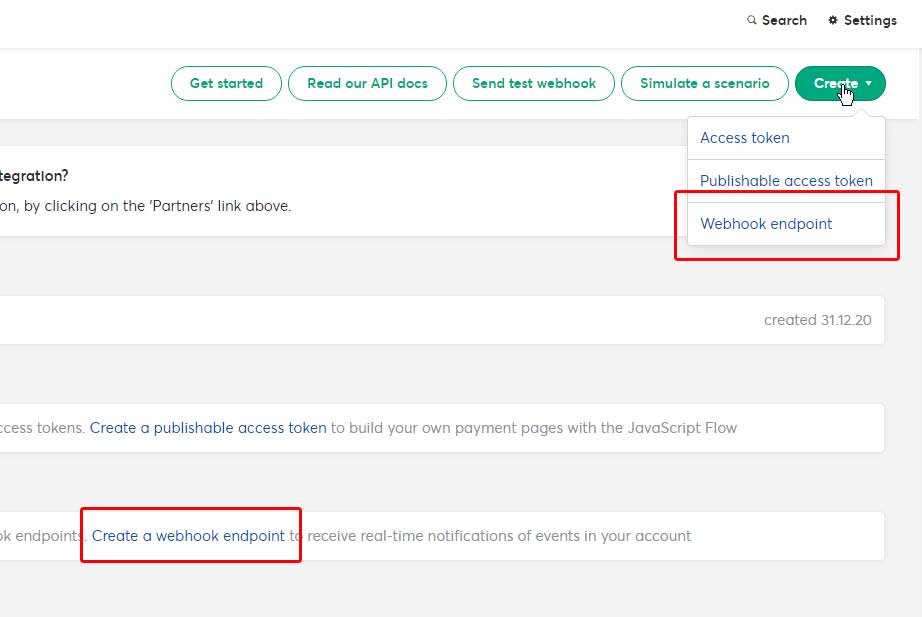
Webhook Settings
Complete the form with the following values:
Name:
IBEAMS
URL:
https://YOURDOMAIN/api/webhooks/gocardless/
⚠️ Important Replace
YOURDOMAINwith your actual system URL.
Do not use the demo URL.
You can find your correct webhook URL inside:
Settings → Payment Gateways → Configure → GoCardless Settings
The remaining fields can be left blank.
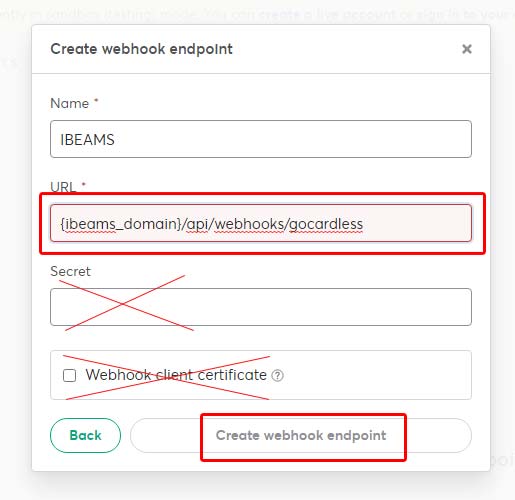
Click Create webhook endpoint.
Step Complete
Step 5: Add the Webhook Secret
Once the webhook endpoint has been created:
- Open the endpoint from the GoCardless Developer page
- Locate the Webhook Secret
- Copy the secret
Return to the IBEAMS GoCardless Settings page opened earlier and paste the secret into the Webhook Secret field, then click Save.
Step Complete
Setup Complete
Your system is now ready to accept Direct Debit payments using GoCardless.
Before going live, ensure you complete your GoCardless profile and connect your bank account so funds can be received.
Testing the Integration
To verify everything is working correctly, perform a test payment.
1: Create a Test Student
Add a test student if you do not already have one in the system.
2: Add Yourself as a Contact
If required, add yourself as a contact.
3: Create a Test Invoice
Create an invoice with the following details:
- Amount: £1
- Due date: Tomorrow
- Student: Test student
4: Activate Direct Debit
Log in to the Parent Portal and activate Direct Debit for the contact.
5: Confirm Setup
If the Direct Debit process completes without errors, the integration is working correctly.
You may either:
- Leave the invoice to allow the £1 payment to process, or
- Delete the invoice if you only needed to test the connection.
Note If the invoice is deleted, no payment will be taken.
Final Step — Enable Direct Debit
Make sure Direct Debit is enabled inside the system.
Navigate to:
Settings → Payment Gateways → GoCardless Settings
Turn Direct Debit ON.